
How to make a shelf with your own hands – 4 cool ways for beginners
Wall-mounted shelves can open up new storage options or become a pretty backdrop for home decor. Small and large, book and kitchen, with hidden mount and console – almost any shelves can be made by hand, and not bought in a store. In this article, we presented 3 simple and budget methods for making shelves and shelves for different purposes, as well as 70 photo ideas for inspiration..
Universal hanging shelf
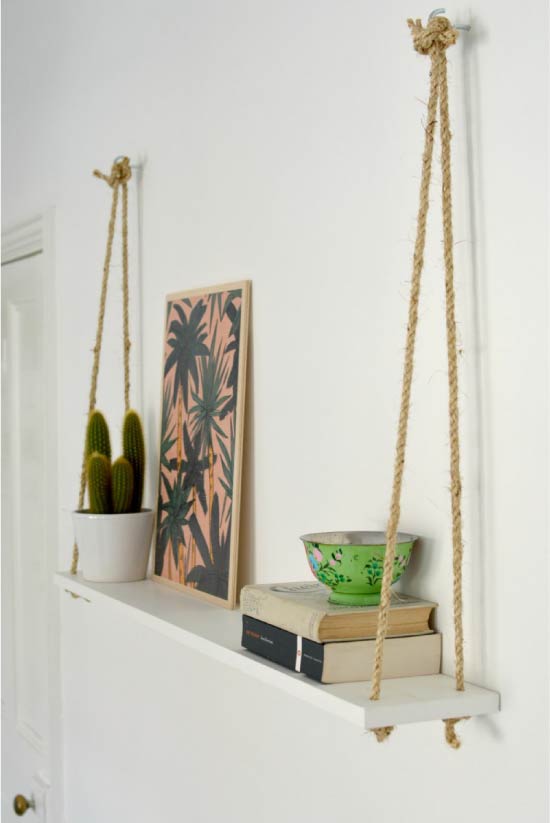
Suspended shelves on ropes have become very popular for a reason. They look much more impressive than regular shelves, and at the same time they are truly functional and versatile. They can be adapted for storing heavy items such as dishes or flower pots, as well as light accessories. And thanks to the side holders, the shelf can also be used for storing books..
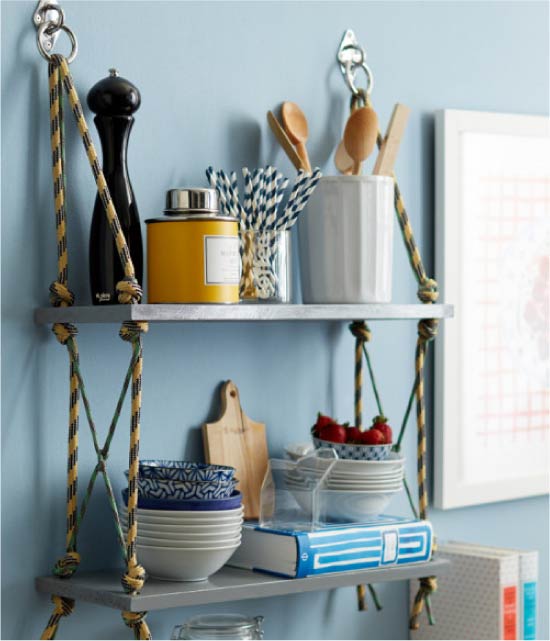
DIY hanging kitchen shelf from wooden planks and ropes

This shelf-pedestal is suspended from the ceiling on ropes 2 cm thick.You can make such a shelf using our instructions, with the only difference that the hooks in this case are attached to the ceiling, and not to the wall.
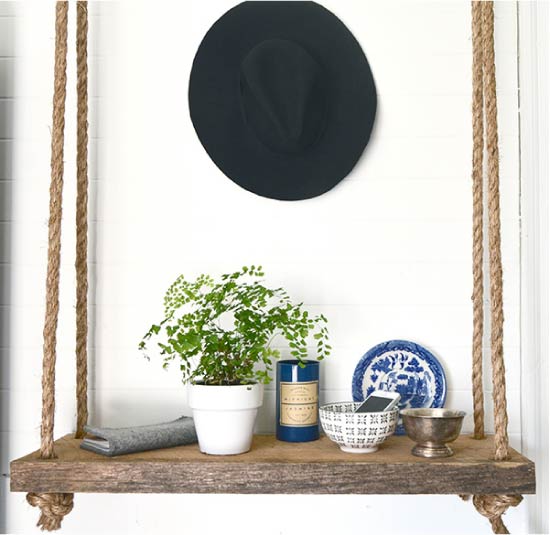
Such a homemade shelf made of rough wood and ropes will look great in a Scandinavian-style interior, eco and country style, loft and rustic
And now we propose to go to practice and make such a universal shelf with your own hands..
You will need:
- 4 wooden boards (2.5 cm thick and any desired length, for example, 1 m long as in our master class);
- Rope rope about 8 mm thick and 4 m long;
- Drill and pen drill with a diameter of 10 mm (the drill should be slightly thicker than the rope);
- 2 steel hooks and concrete dowels with a diameter of 8 mm;
- Perforator and drill for concrete 8 mm;
- Pencil.
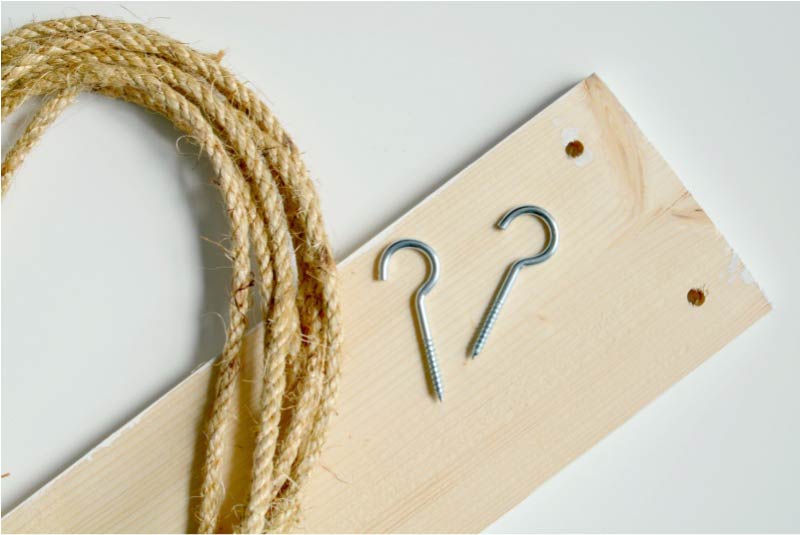
Basic materials needed to make a shelf
Master Class:
- With a drill and a feather drill, drill a hole in each corner of the board (first draw the markings with a pencil). Remember that the holes should not be too close to the edges..

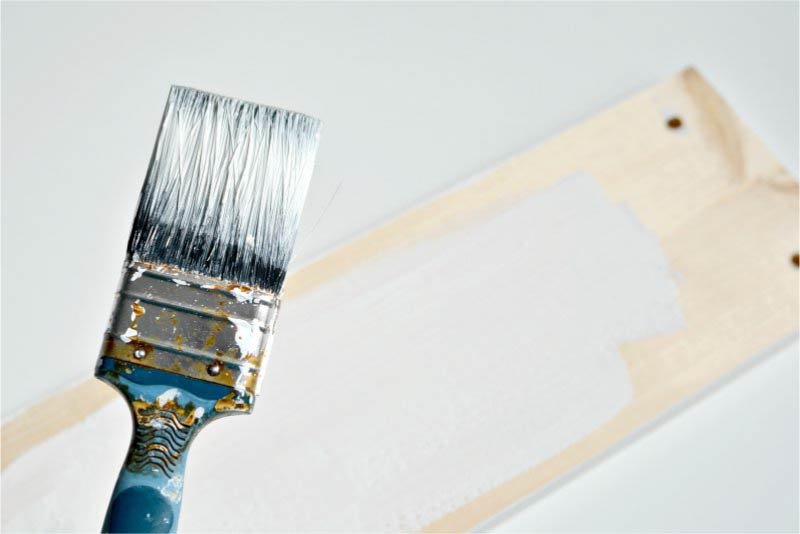
- Paint your board with paint / stain, and then, when the finish is dry, treat with a matte varnish or wax (this is not necessary, but it is advisable – if you want to protect the shelf from damp cleaning and scratches).
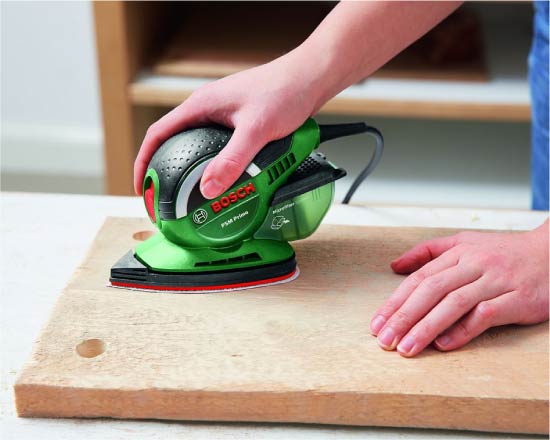
- If you want to preserve the natural color and texture of the wood, simply sand the board from all sides with coarse sandpaper or a sander.
- Install the steel hooks on the wall: first make marks with a level, then drill holes with a hammer drill for 8 mm concrete, insert 8 mm dowels into the holes and finally screw the hooks into them.

- Cut your 4-meter rope into 4 equal 1-meter pieces.Pass the ropes through the holes in the board, and then tie their ends on the back of the board in a knot as shown in the photo below..
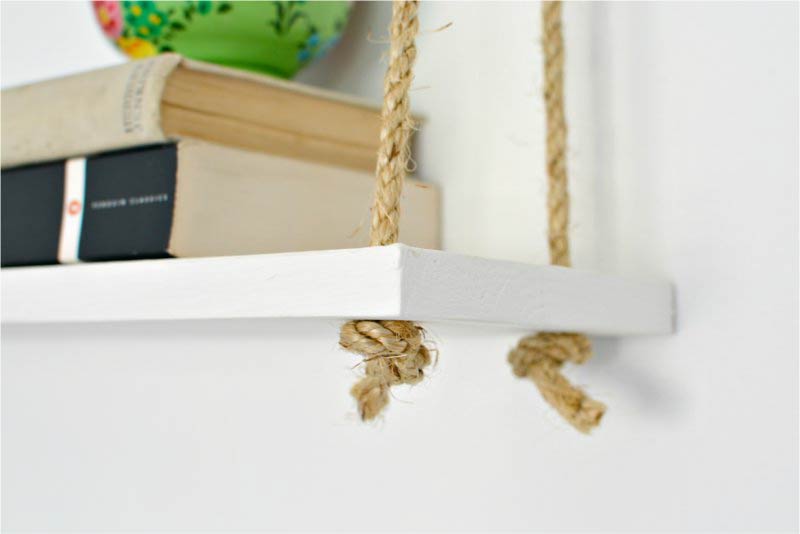
- Now that there is a pair of ropes on each short side of the board, knot the ends of each pair and hang them on the hooks. Make sure the shelf hangs straight and adjust the top nodes if necessary. By the way, in the future you will be able to adjust the length of the ropes at the expense of the upper knots..

You can experiment a little with the ways of attaching the ropes and make not only shelves, but even hanging racks with your own hands..


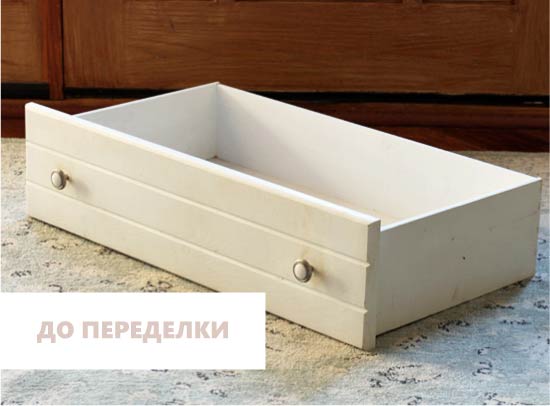
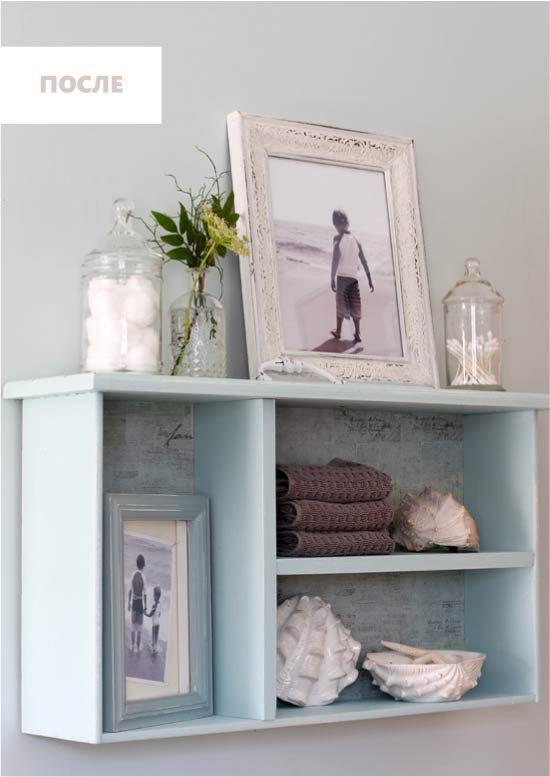
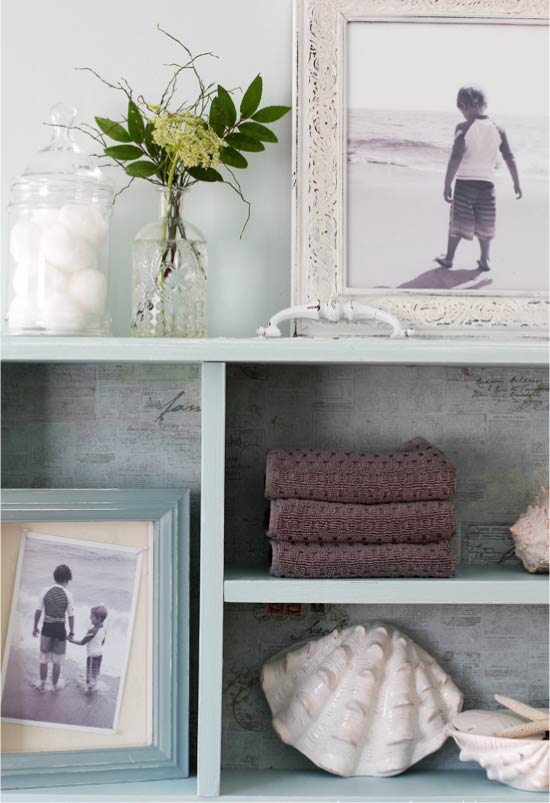
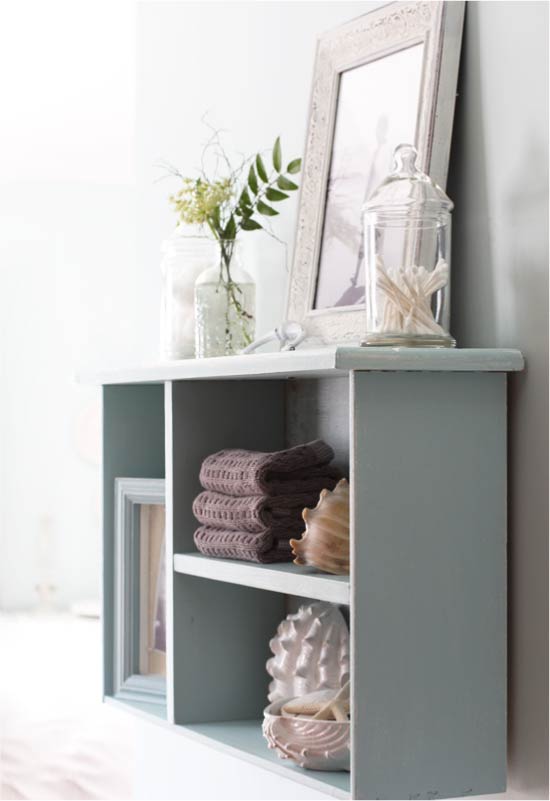
Drawer shelf
If you have an unnecessary drawer from a chest of drawers, then you can make such a beautiful shelf with dividers out of it. In it you can store something that should always be at hand or in plain sight..
You will need:
- Box;
- Paint the desired color and brush;
- Wax or matte varnish;
- Wooden board or plywood of small thickness;
- Wood glue or liquid nails;
- Shelf hinges;
- Two dowels 8 mm and screws for them;
- Perforator and drill for concrete 8 mm;
- Phillips screwdriver;
- Jigsaw;
- Medium grit sandpaper;
- A piece of wallpaper for the back wall decor;
- Wood putty.
Master Class:
- Use a jigsaw to cut spacers out of the plywood / wood board to the correct size, then sand all around with sandpaper.
- If the drawer has handles, remove them and fill the holes with putty..
- Paint the box 2-3 layers, letting each layer dry completely. If you want to achieve a scuff effect, rub the box in some places with sandpaper..
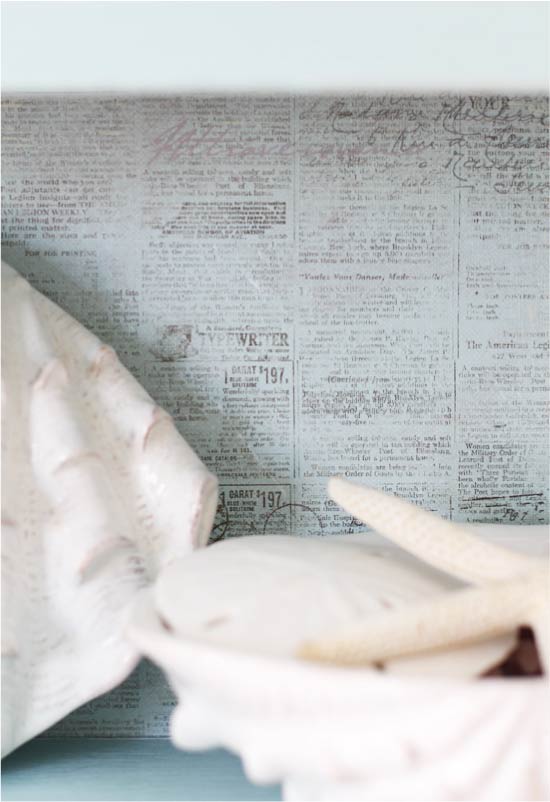
- On the back of the shelf, glue a piece of wallpaper cut exactly to its size. You can glue the wallpaper with wallpaper glue or any universal glue.
- Install spacers using wood glue or liquid nails.
- Next, coat the box with wax or matte varnish to protect the top coat from damage and moisture..
- On the back of the shelf, nail or screw two metal hinges onto the self-tapping screws.
- Make two holes on the wall, after making a markup with a level, insert the dowels into the holes, and screw the screws into them, but not completely, but leaving about 5 mm. Well that’s all, now you can hang the shelf on the wall.
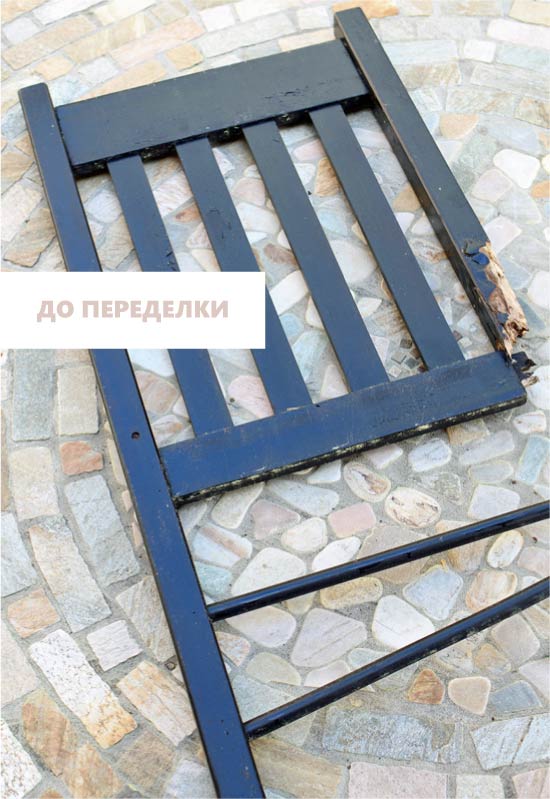
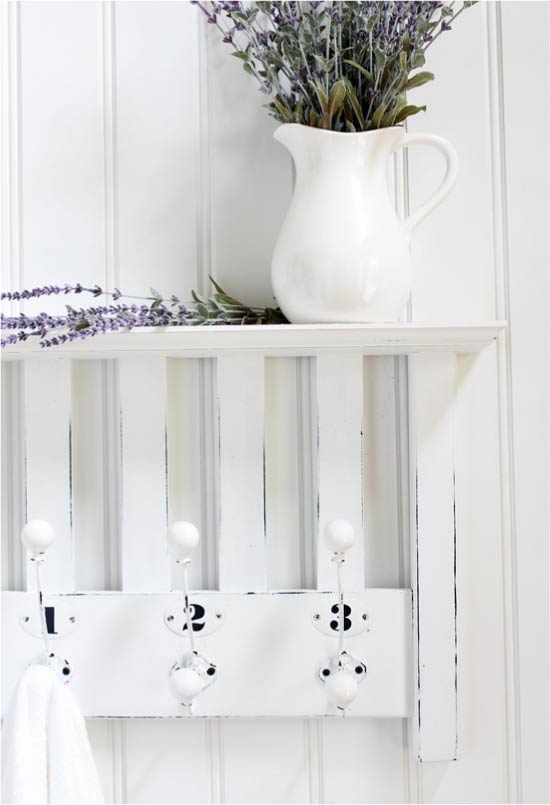
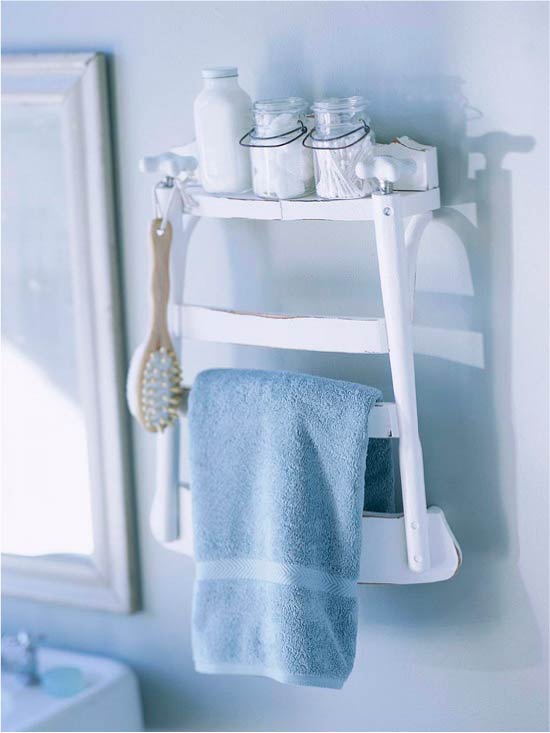
Shelf-hanger from … chair back
If you have an old wooden chair, or rather the back of a chair, then you can make a nice shelf with hooks out of it. It can also be hung in the kitchen to be used for storing kitchen towels and aprons, and in the bathroom, and in the hallway..
This was the back of the chair before the alteration …
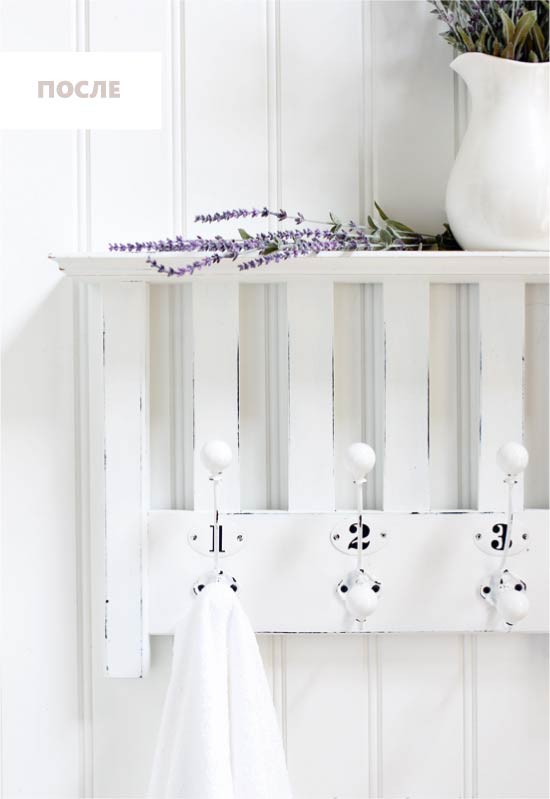
… and this became after!
You will need:
- The back of a wooden chair;
- A small plank of wood or plywood;
- Three metal hooks;
- Pendulum saw for wood, grinder or jigsaw;
- 5 or more wood screws and a screwdriver / screwdriver;
- Drill and drill 3 mm;
- Medium grit sandpaper (for removing old varnish / paint from the back of a chair) and coarse grit (for sanding wood shelves);
- Black paint (if you want to create a scuffed effect), white paint or any other desired color, brush;
- Wax or matte varnish;
- Wood putty;
- Carpentry glue.
Master Class:
- Cut the back of the chair to the desired size, after making the markings.
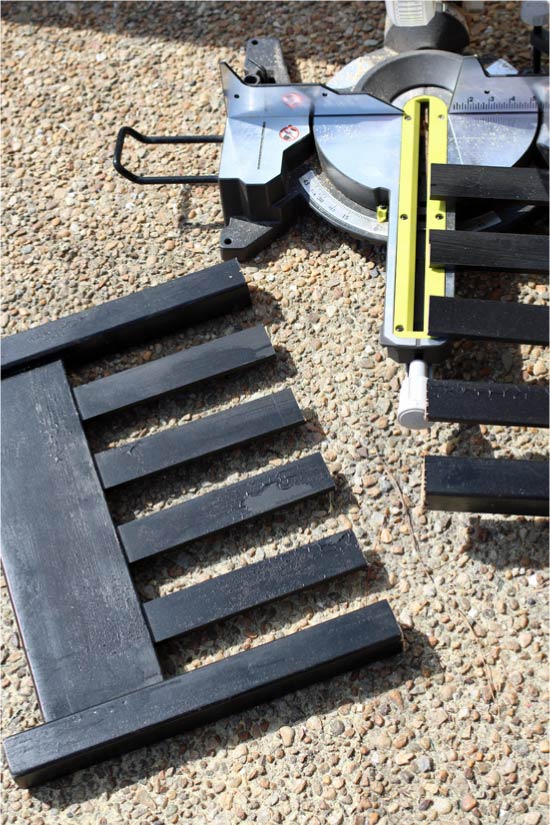
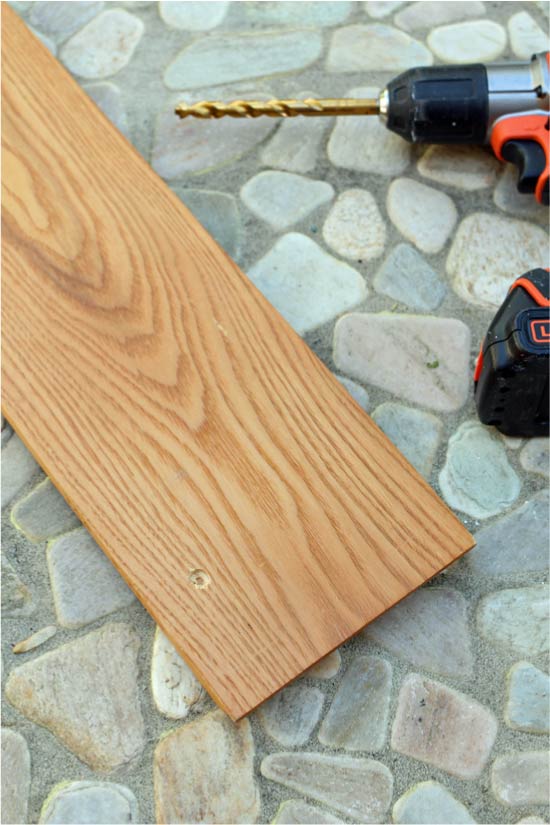
- In this project, the wooden base of the former hanger has been successfully fitted for the manufacture of the top shelf. You can use a board made of wood or plywood – you need to cut it to the desired size, and then sand all the ends. If possible, it is advisable to arrange the edges of the workpiece with a milling cutter.
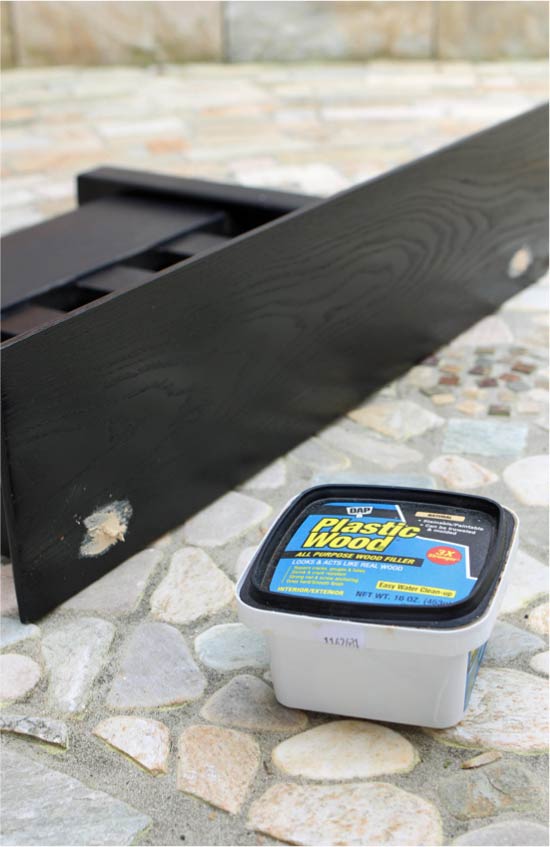
- With a medium grit sandpaper (eg 220 microns), remove the old covering from the back of the chair, then paint both parts with black paint and leave to dry. This is necessary so that in the future the black layer appears through the abrasions of the top coating..
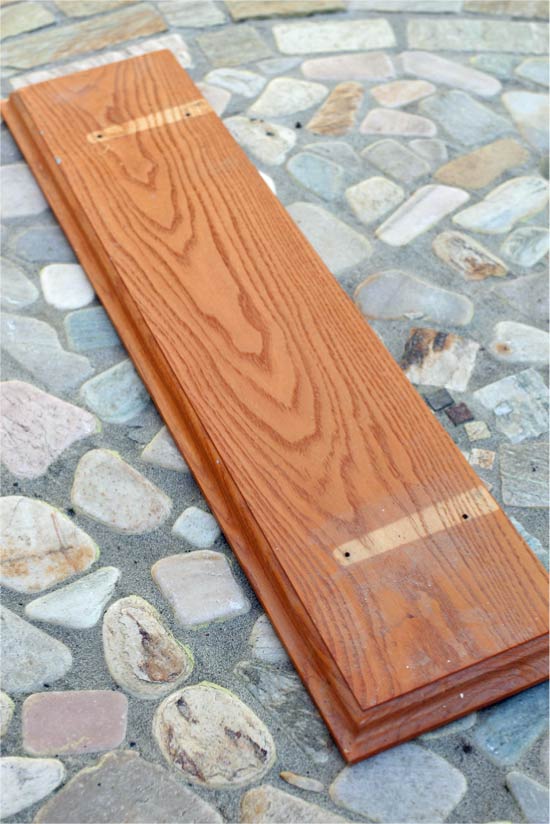
- It’s time to attach the board to the back of the chair. To do this, drill a small hole from each edge of it (from the outside, where you want to fasten the parts), then screw in the self-tapping screws, drowning them flush. If there are vertical bars in your chair back as in this project, then it is advisable to also fasten them to the shelf with wood glue..
- Cover the attachment points with wood filler, following the manufacturer’s instructions.
- Now screw the hooks to the bottom bar of your shelf after making the markings. If necessary, the hooks can be painted (before attaching to the craft).
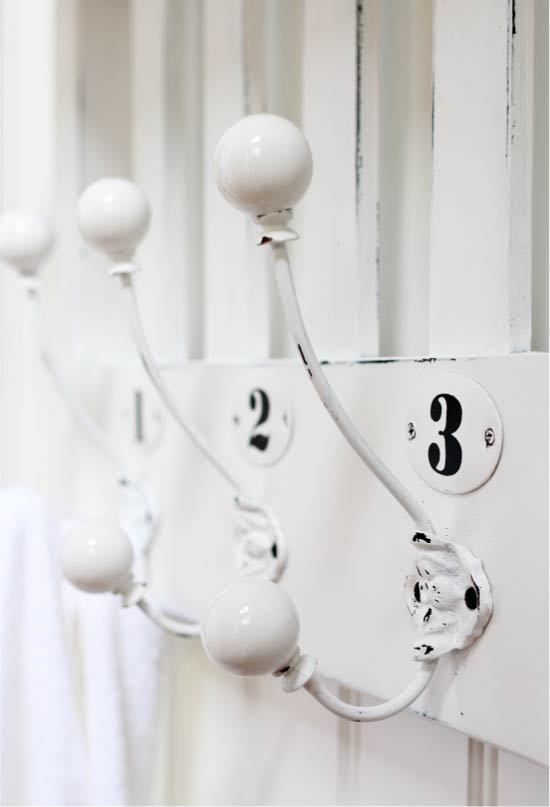
- If desired, screw on the plate over each hook. The plate itself can also be decorated with numbers using a stencil, a small brush and black acrylic paint. However, you can come up with your own way to decorate the shelf..
- Paint the entire craft white (or whichever color you choose), and then rub some areas with sandpaper to expose a black layer of paint.
- Finally, cover the shelf with a matte varnish, or better with wax, to protect the top coat from chips, moisture and scratches..
In fact, chairs can be used to make shelves in a variety of configurations. Here are some more photo ideas for your inspiration..
Bathroom shelf from chair back


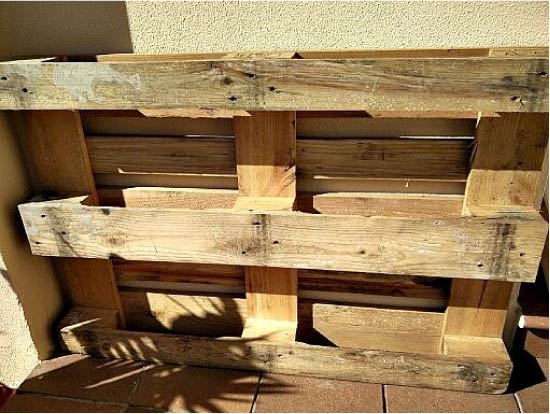
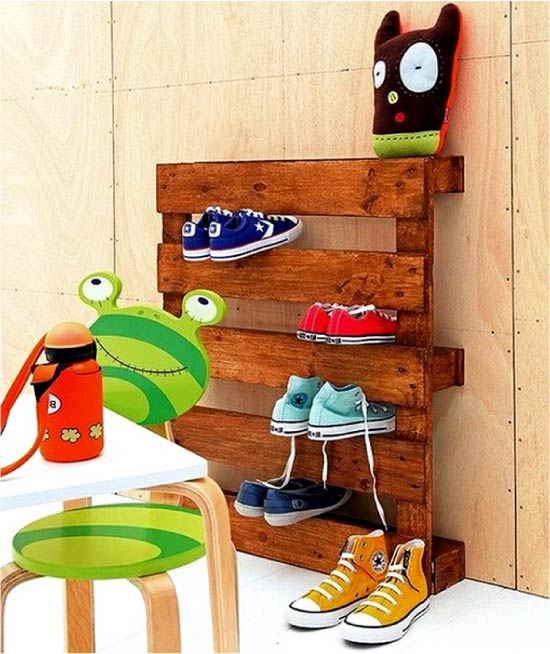
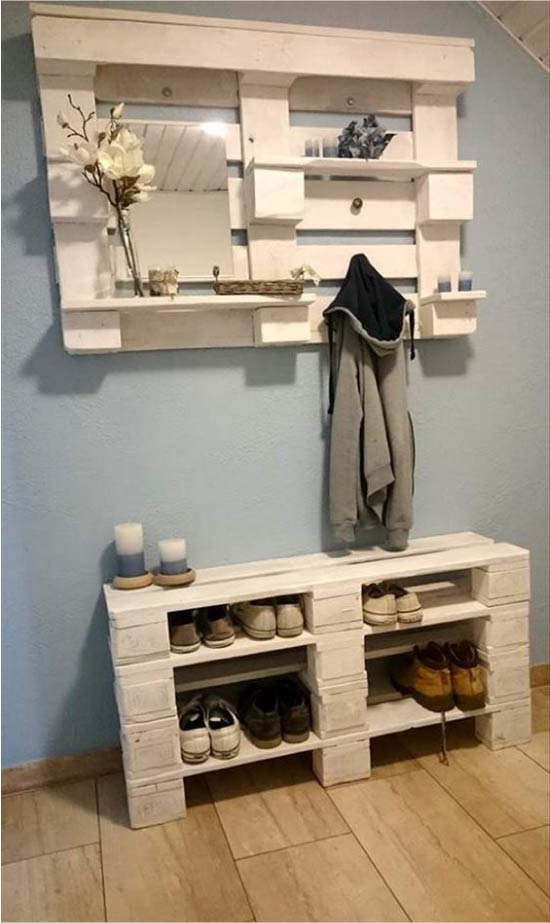
Pallet shoe rack
Want to make a shoe rack without using a jigsaw or drill? This is possible, you just need to find / purchase a wooden pallet (pallet) and slightly modify it.
- Used pallets are often given away for free or sold for 100-200 rubles on flea market sites like Avito. You can also ask around for used pallets at local construction sites, warehouses and wholesale stores. New pallets can be ordered in specialized online stores for only 200-250 rubles.
How do you turn an old pallet into such a cute country-style shoe rack with your own hands? Take some free time and follow the next step by step instructions.
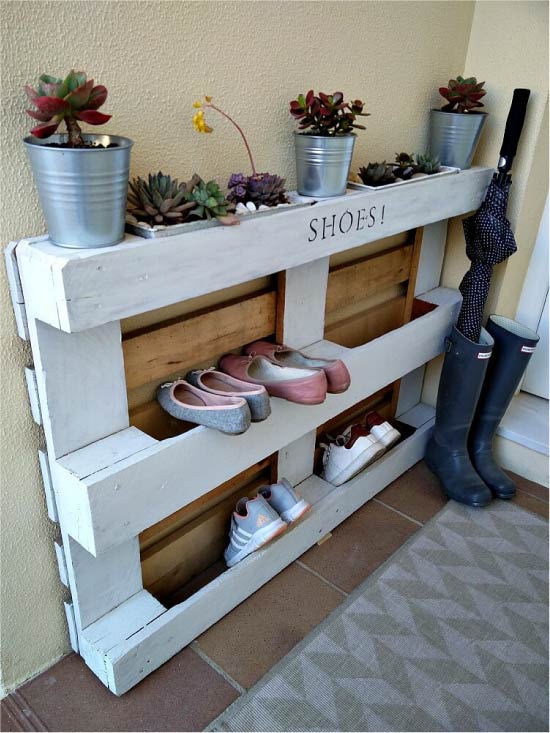
Pallet shoe rack
You will need:
- Wooden pallet;
- Manual / electric sander with triangular and standard attachment or sander. If there is no machine, use a small block of wood and wrap it with sandpaper;
- Grit 40, 80 and 120 grit sandpaper;
- Brush;
- Gloves;
- Soft rags;
- Protective dust mask;
- Moisture-proof primer for wood (preferably with an antiseptic);
- Paint / stain and brush;
- Wax or matt varnish.
Master Class:
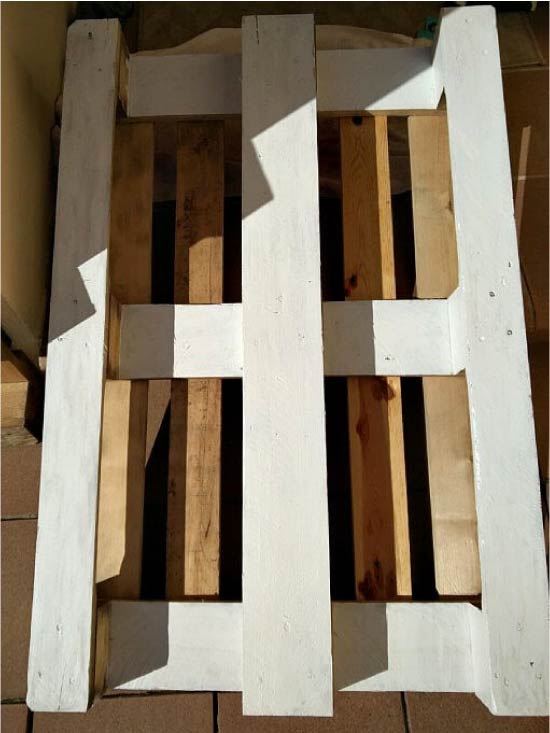
- Sand your pallet on all sides or only the part that will be visible: first use coarse sandpaper to remove the roughest bumps, knots and dirt. Then continue sanding with a medium to fine grit sandpaper. Next, remove dust with a brush, vacuum the entire pallet and finally wipe it down with a damp cloth.
This is what your pallet will look like after sanding.
If you are a beginner, we recommend watching this video tutorial on sanding a pallet..
- Apply a water-repellent primer to the entire (!) Pallet. It will protect the wood from rotting and moisture that will drain from the shoes, and prepare the surface for painting..
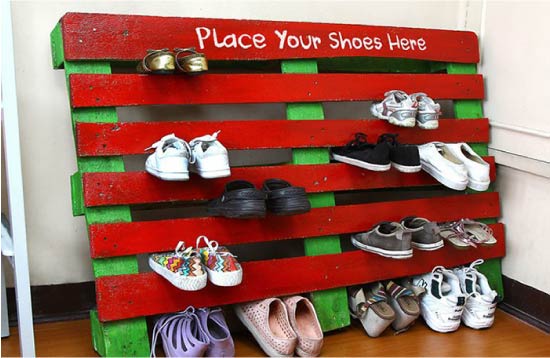
- When the primer is dry, start painting the shelf. You can paint the entire pallet or only its “front” part as in this project.
- When the paint is dry, cover the pallet with matte varnish or wax. If you want to preserve the texture and pattern of the wood, treat the pallet with a stain of the desired tone or completely cover the shelf with only matte varnish / wax..
- Using a stencil, acrylic paint and a brush, write “Shoes!” In the center of the top of the shelf. as in this project or any other word / picture.
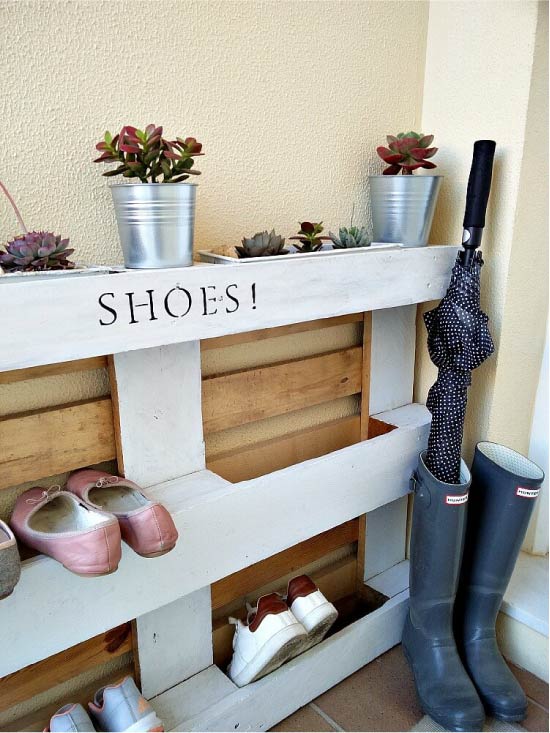
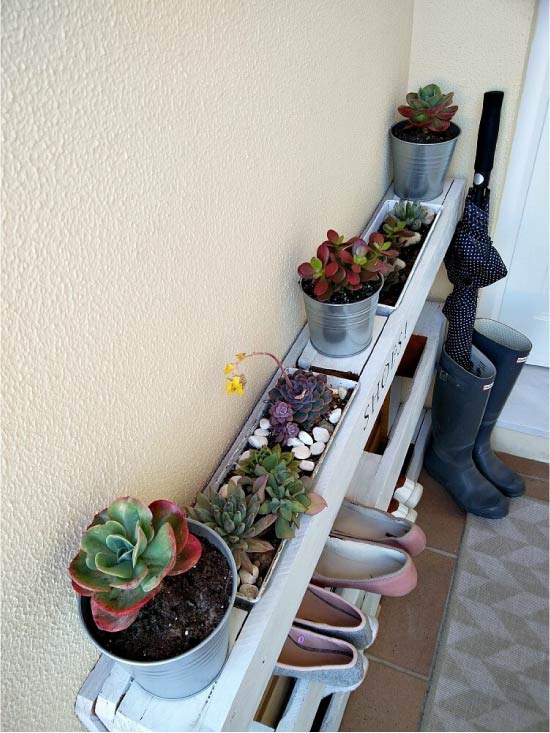
- The top of the shelf can be decorated with houseplants such as succulents in containers and bread buckets.
- You can upgrade your shoe rack by integrating wooden slats into the middle and upper tiers (you just need to cut them to the right size and nail them down).
Here are some more photo ideas for making a shoe rack with your own hands..
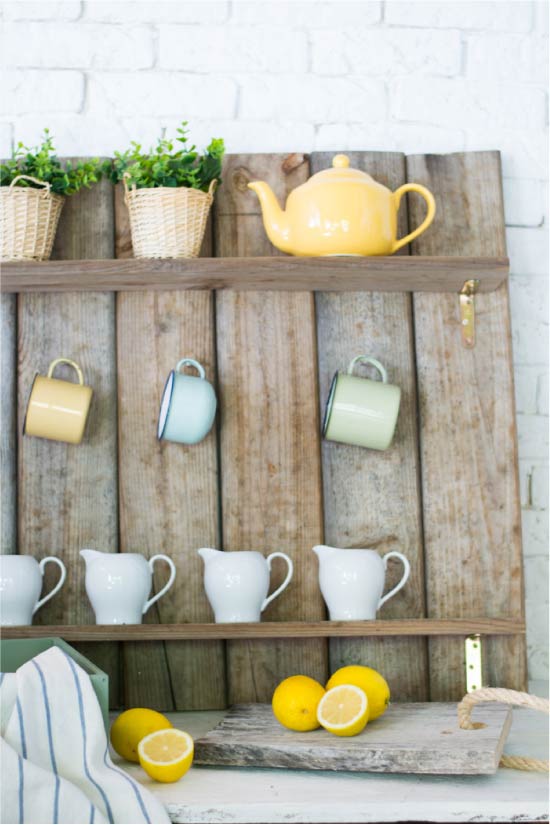
With a little work with a nail puller, hammer and jigsaw, you can convert the pallet into a kitchen shelf, display shelf, shelf for flowers or tools..
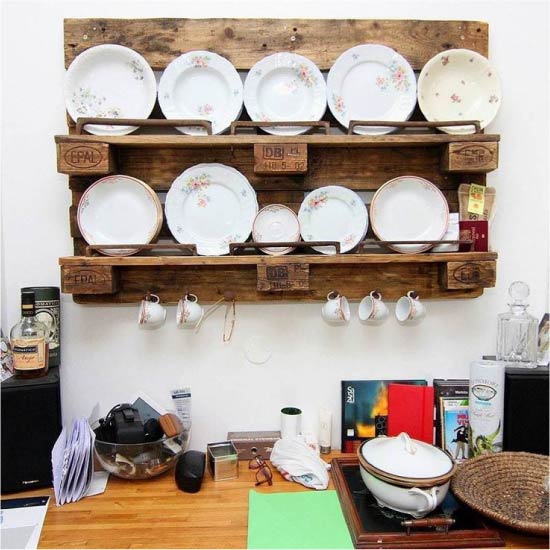
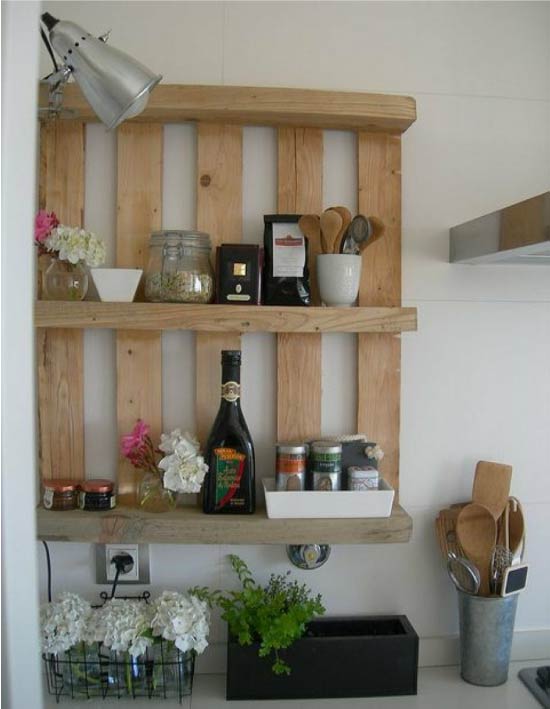
Homemade kitchen shelf from pallet
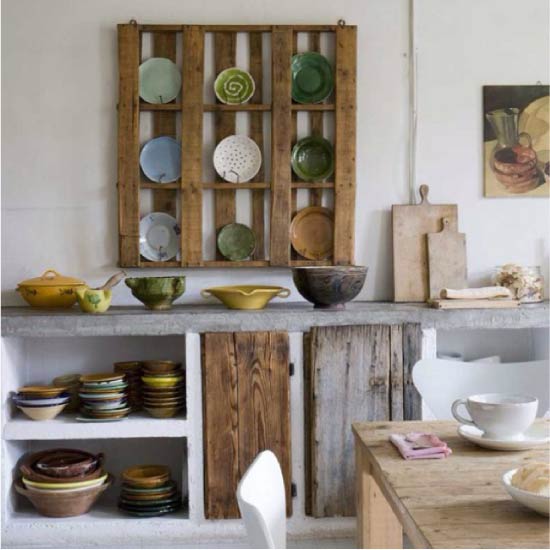
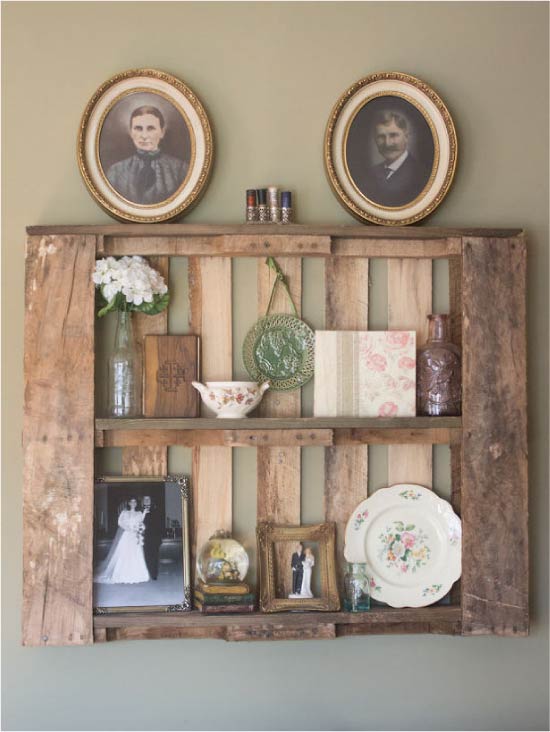
Homemade kitchen shelf display cabinet from pallet
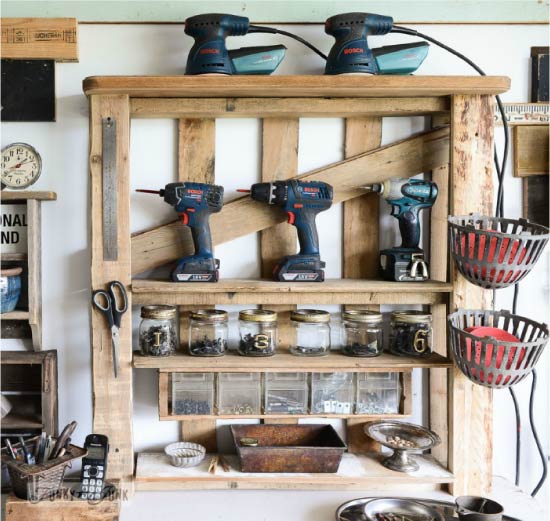
Tool shelf
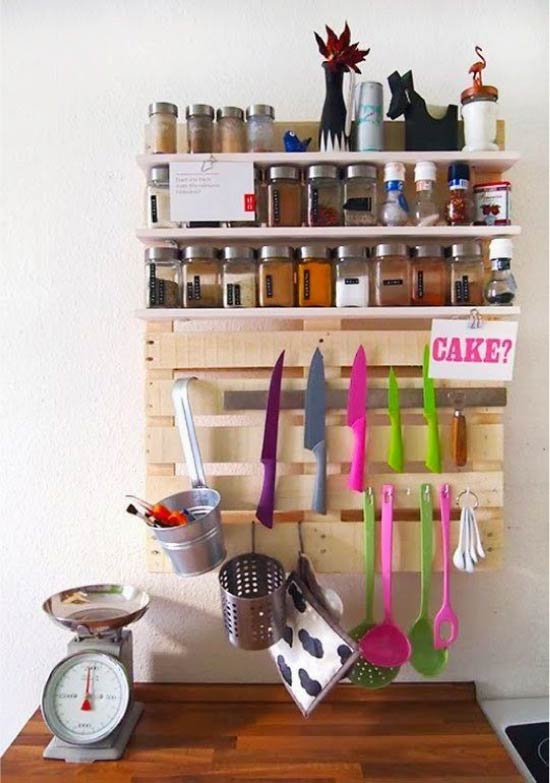
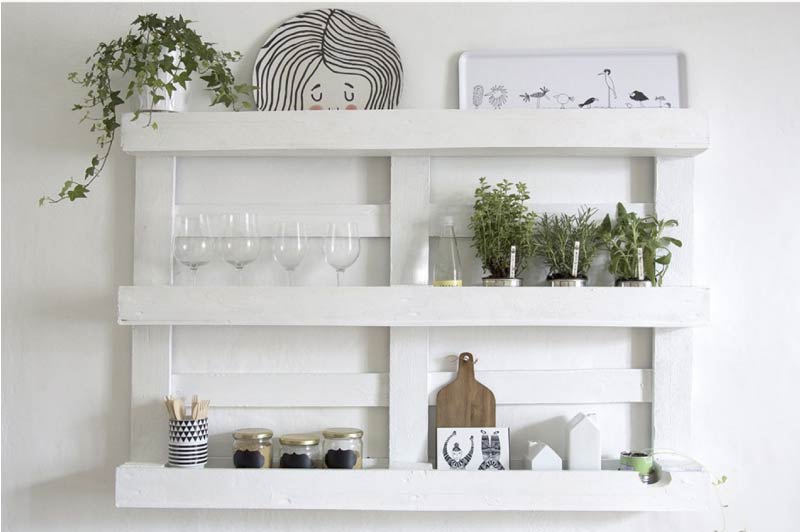
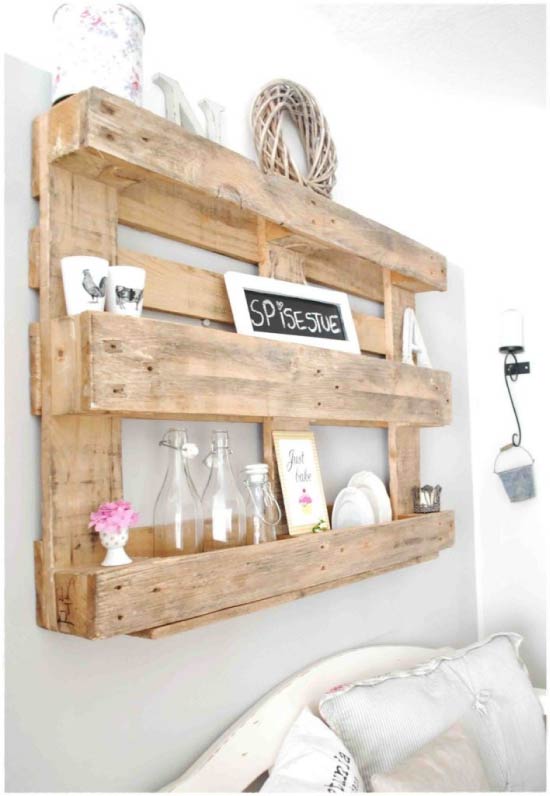
DIY spice shelf from a pallet
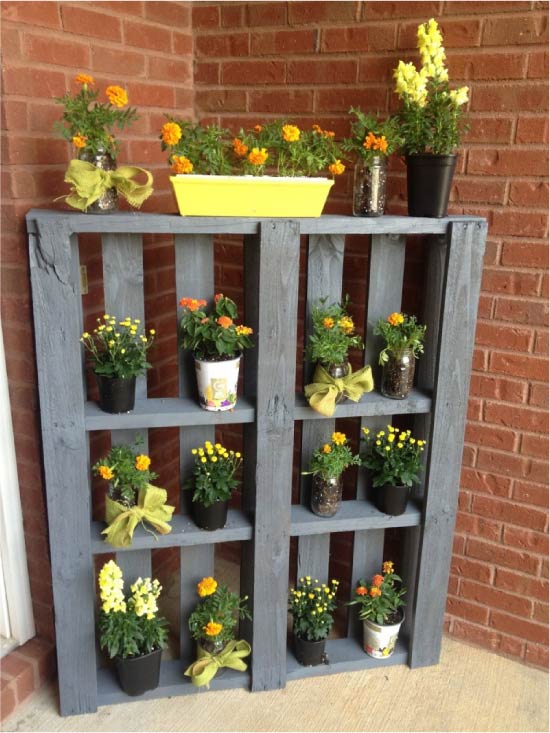
Shelf for flowers from a pallet
Shelf-showcase from a pallet in the living room
Homemade shelf in the kitchen
Photo gallery of ideas
If none of the ways of making a shelf that we have proposed appeals to you, we suggest looking for ideas in our photo gallery. Here we have collected other examples of wall shelves that you can make with your own hands from wooden boards, the same pallets, boxes and other readily available “lumber”.
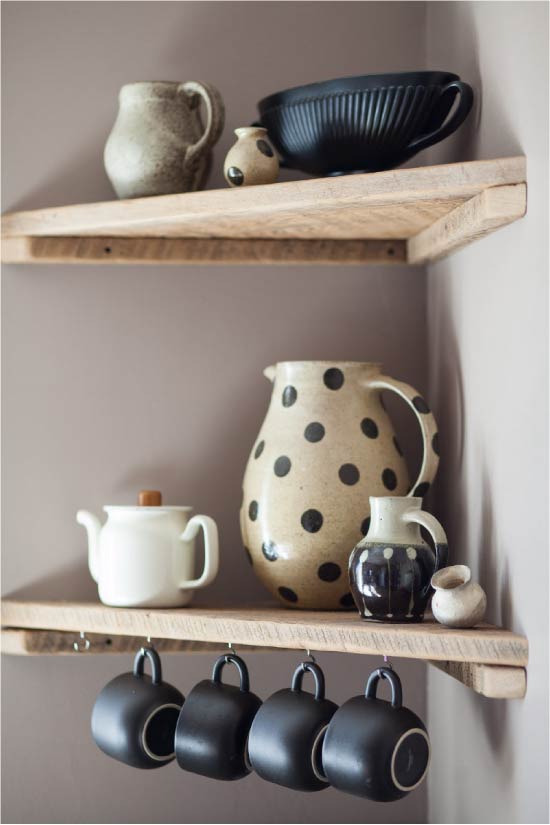
Corner shelves
Making a corner shelf with your own hands is as easy as shelling pears. To make one shelf, as in the photo below, cut out a triangular blank of the desired size and with the required angle (rarely, the inner corners of the walls are exactly 90 degrees) from plywood or wood 1.5-2.5 cm thick, as well as two small support strips (length one plank should correspond to the leg of the triangular workpiece, and the length of the second plank should be calculated using the formula: leg length minus the width of the first plank).
DIY corner shelf
All parts must be thoroughly sanded and then painted or simply waxed / varnished. Next, make a markup using a building level both on the walls and on the planks (note that the holes will be through!). Drill holes in the walls, insert dowels into them, and then hang the supports on the screws using the through-mounting method. It is important to choose the right screw length – it should be calculated using the formula: dowel length + support bar thickness + screw diameter. Finally, you just have to install the shelves and fix them either with wood glue or with nails / screws for wood. If you want to hide the caps of the screws, use wood putty, and then paint over the “patches” with paint to match the shelf.
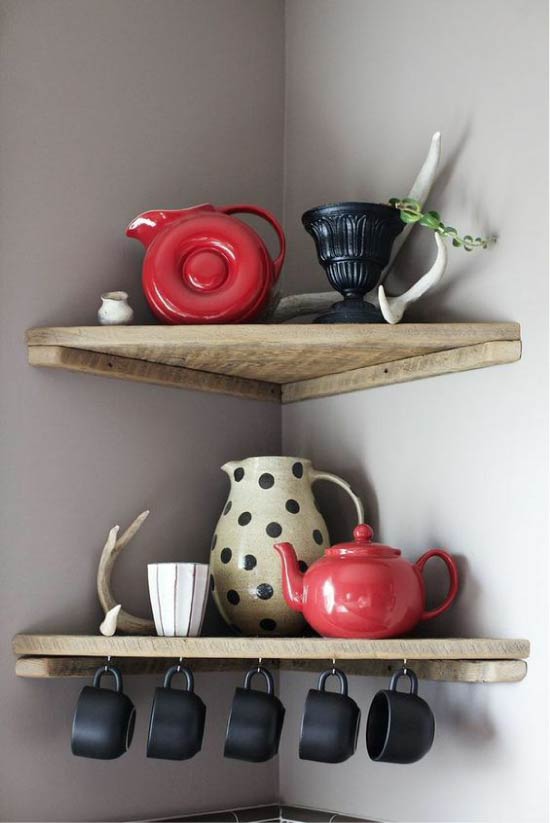
Mug hooks can be screwed into the bottom of the kitchen corner shelf
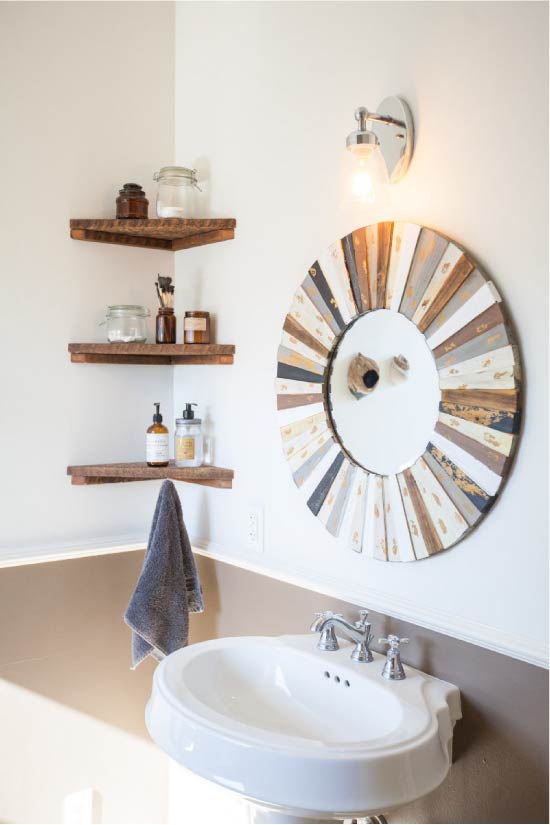
Homemade corner bathroom shelf

Homemade corner shelves in different sizes
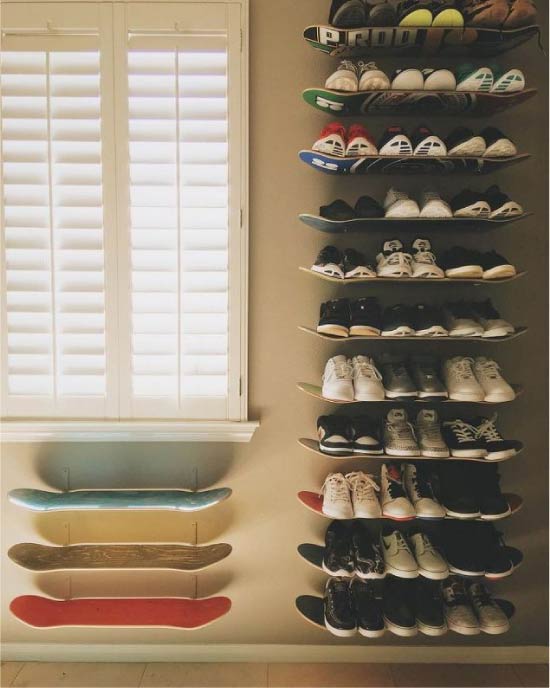
Skateboard Shoe Racks
To make a shelf from a skateboard, you need to remove the wheels from it, and then hang it on the wall on the brackets.
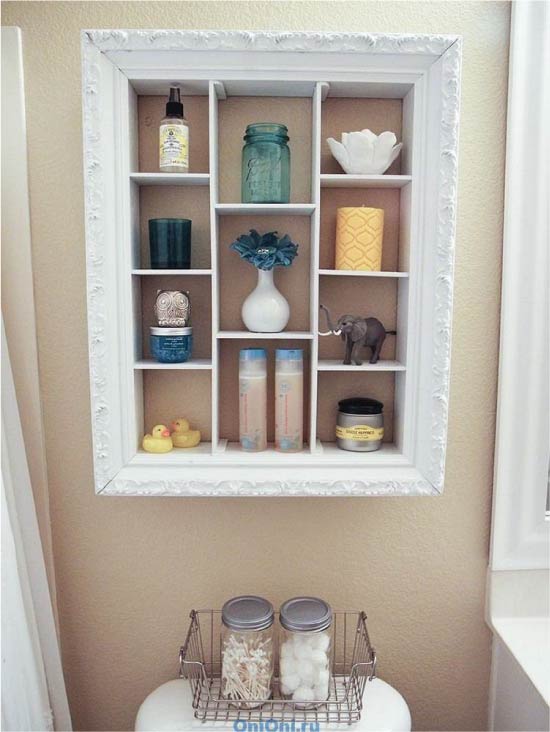
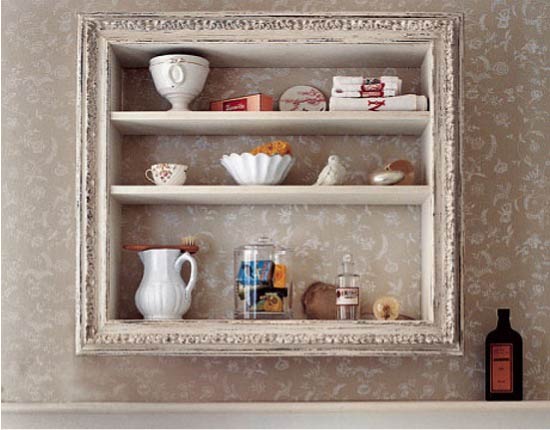
Shelf in a baguette
A shelf framed by a frame is easy to do: first you need to put together a frame from boards according to the size of the frame, then you need to install several separator strips inside the box.
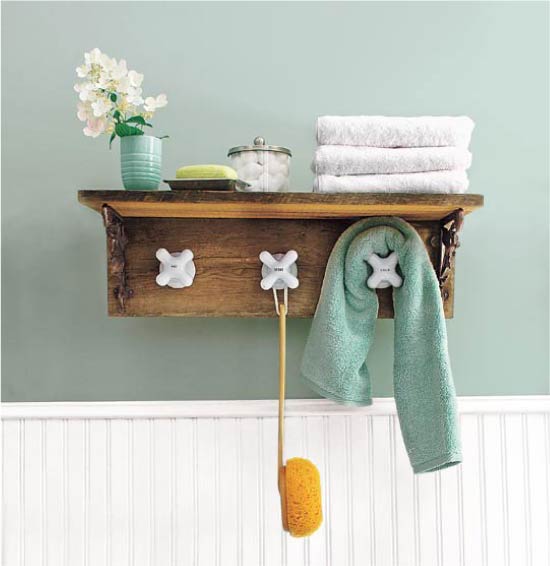
Shelf with flywheel hooks
If you have a simple wooden bathroom shelf, decorate it with cross ceramic faucet handwheels. It’s hard to come up with a more stylish thing!
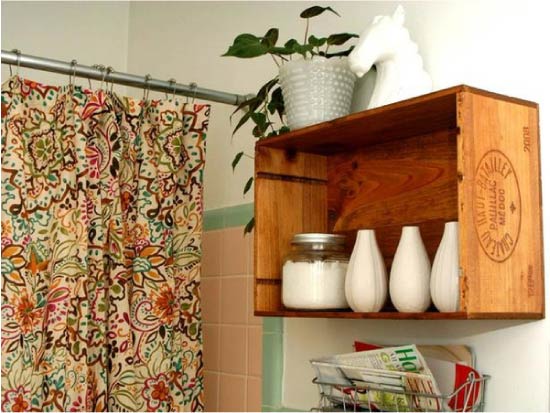
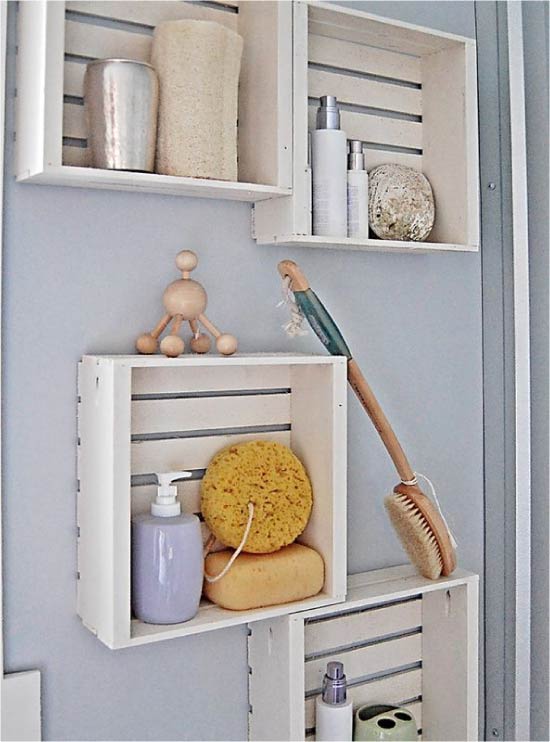
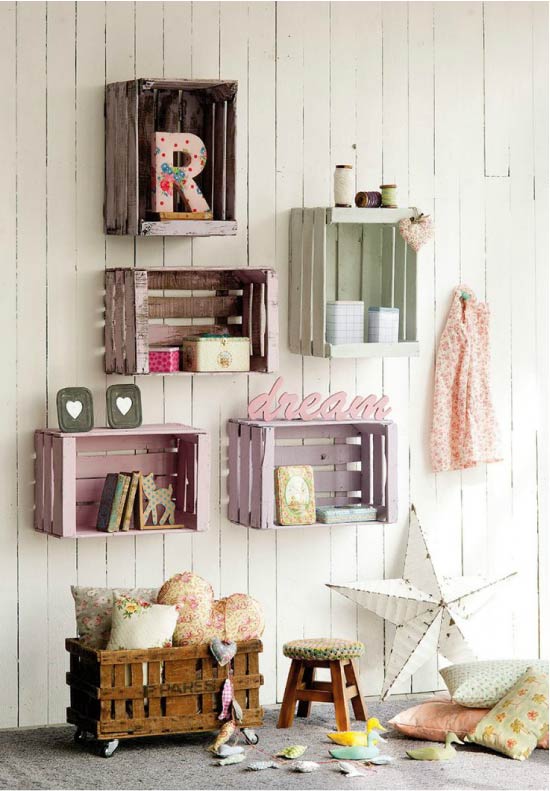
Storage system from hanging boxes
Drawers are almost ready-made shelves that you just need to hang on the wall.
Multiple drawers of a single type can be made into a complete modular storage system.
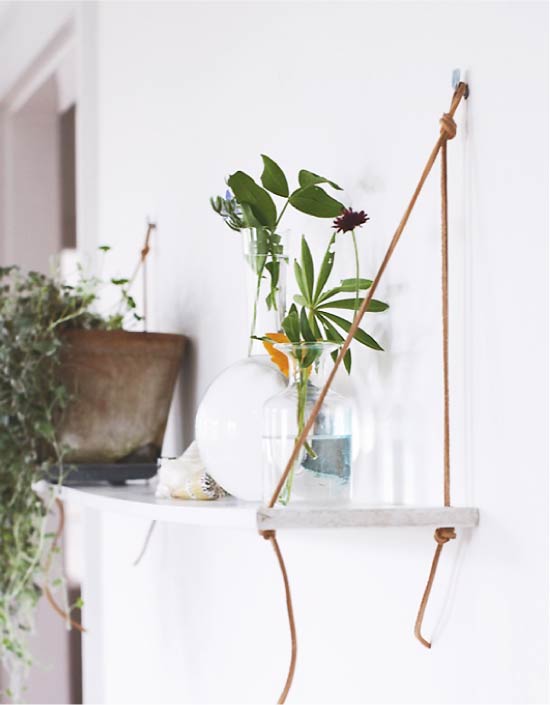
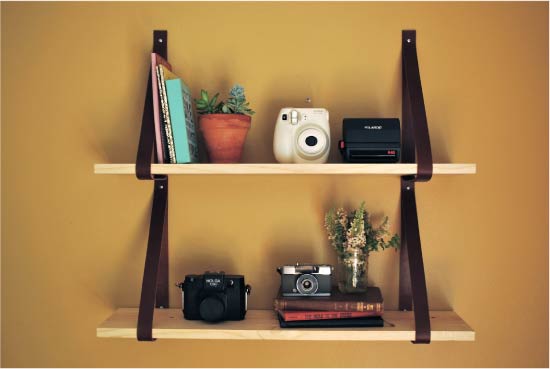
Hanging shelves made of wood plank and leather straps
From a wooden board and a pair of leather belts, you can make such a stylish hanging shelf with your own hands for one or two times.
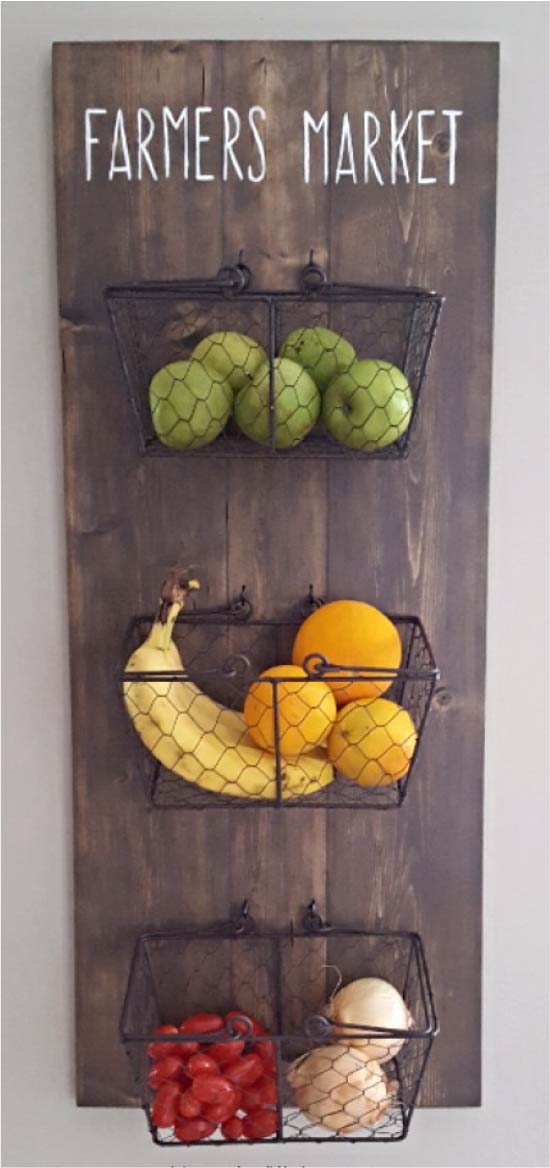
Shelf for storing fruits and vegetables
As you know, some fruits and vegetables need to be stored at room temperature. But where to find a place for this? Our answer is on the wall with the help of such a shelf made of wooden boards and metal baskets..
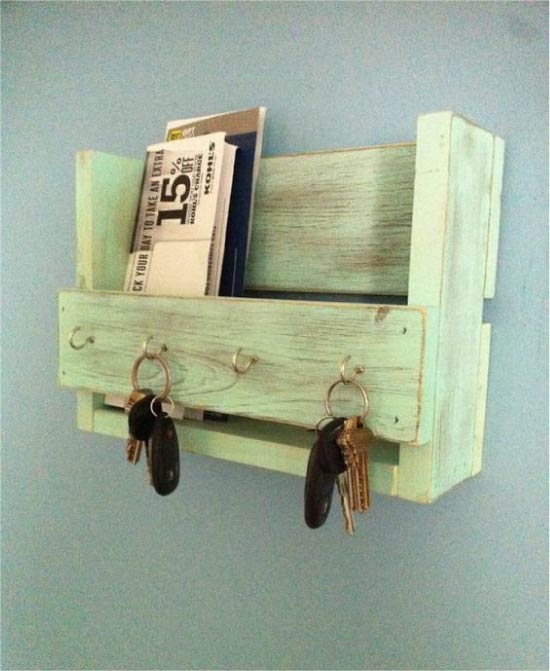
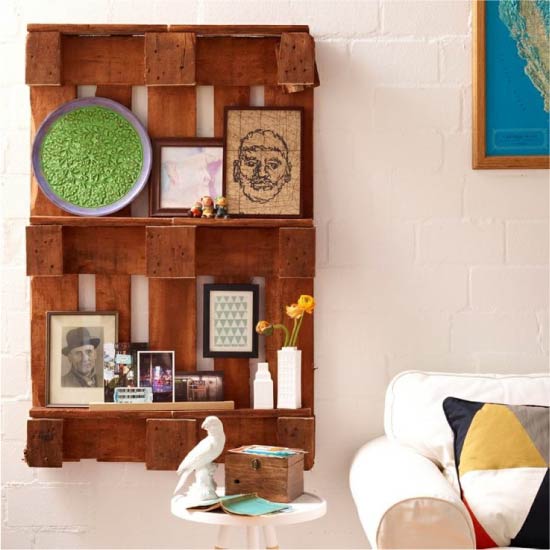
Pallet shelves
Roughly hewn from pallet planks, this mini shelf is suitable for storing bills and keys.
Here are some more ideas for shelves and wall organizers that you can put together from pallets or planks from them..
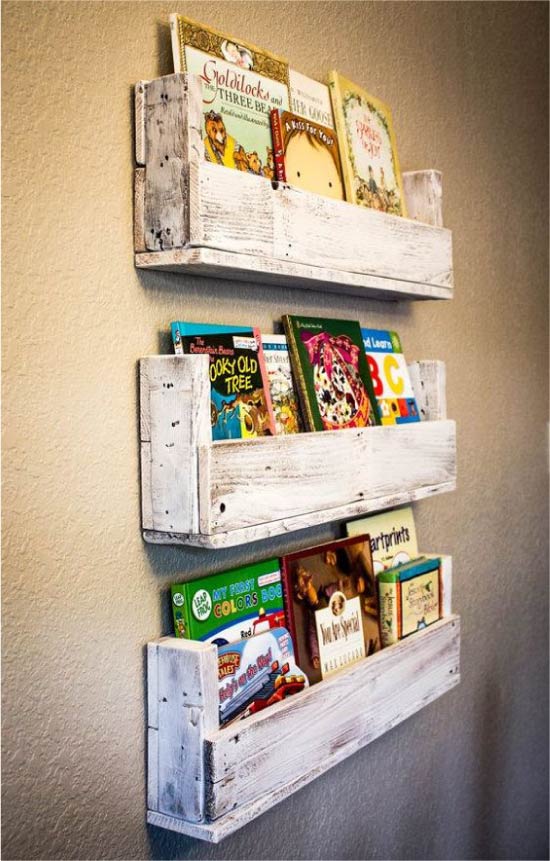
Bookshelf showcase
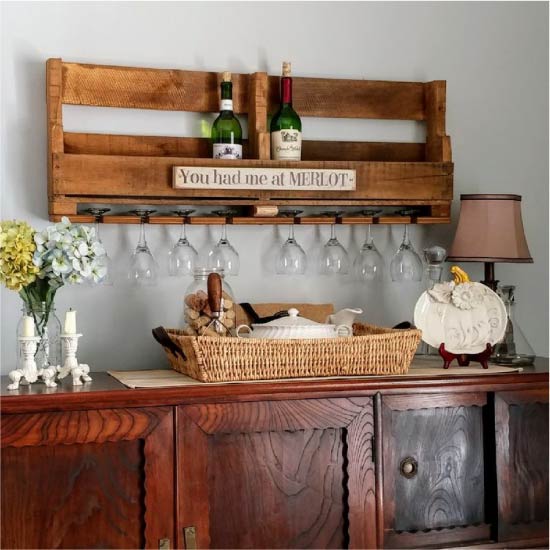
Homemade Wine Rack

Shelf for kitchen utensils

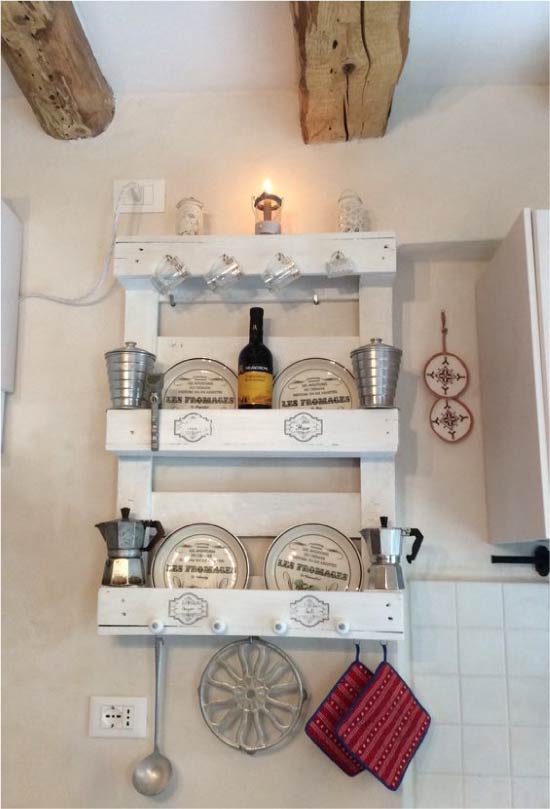
Shelf for spices and kitchen utensils
The following video instruction will help you to make a wine rack as in the photo above..